

If you can’t find slave-free Easter eggs that you like, sometimes you have to make your own from slave-free ingredients! We’ve been doing great marshmallow Easter eggs for some years now, but this year I think we’ve finally nailed how to make creme eggs!
Classic vanilla creme eggs:

Peppermint creme eggs - for variety and to share with vegan friends:
If you’d like to make some yourself, here is our recipe. There are photos of various parts of the process after the written recipe. It’s a bit time-consuming, but none of it is hard. You’ll need chocolate egg moulds, a sugar/meat thermometer and a good beater for best results, but none of those are strictly necessary.
Ingredients
This makes 16 peppermint creme eggs and 32 vanilla creme eggs using these moulds (which have cavities about 3cm across, 4cm long and 1cm deep and are hard plastic - silicone moulds don’t work well for filled eggs). The eggs come out about 2/3 the size/weight of commercial creme eggs. If you don’t have moulds, you can make creme eggs on sticks (see end of recipe) but they won’t look as good.
If you only want to make classic vanilla creme eggs (or only want peppermint ones), all you need to do is alter the flavouring/colouring as appropriate: the filling for both is essentially the same.
-
glucose syrup:
- Either 65g glucose (buy from home brew suppliers), 1/4t cream of tartar, pinch of salt, 2 T water
- Or 90g liquid glucose
-
450g sugar (either Woolworths own brand white sugar, which is independently audited through Bonsucro, or Trade Aid’s golden granulated sugar)
-
1/2 cup water
-
1 tsp liquid invertase (the ‘magic’ that makes the eggs creamy. Buy from speciality cake shops - I got mine here) OR 1/2 tsp powder invertase
-
2/3 tsp vanilla essence (child labour is a big issue in the natural vanilla industry. Buy ‘imitation vanilla essence’ or Fairtrade vanilla extract from Taylor and Colledge - stocked by some PakNSave and New World supermarkets)
-
1 drop red food colouring and 3 drops yellow food colouring OR 4 drops E110 yellow food colouring OR egg yolk yellow powder colour
-
1/3 tsp peppermint essence
-
1 small drop green food colouring
-
175g dark chocolate -your best slave-free options are Pico super dark bars (available from Woolworths), Tony’s Chocolonely dark chocolate or Bennettos (both only available online at present) because both the sugar and the cocoa are certified slave free. The next best options are dark chocolate chips,drops or blocks that are Rainforest Alliance certified chocolate, where at least the cocoa is slave free.
-
350g milk chocolate -your best option is Tony’s Chocolonely milk chocolate as this contains slave-free sugar as well as cocoa. If that doesn’t work for you then look for Rainforest Alliance certified milk chocolate, where at least the cocoa (chips,drops or bars) is slave free. Whittakers milk, Woolworths milk, Nestle Bakers choice milk or Ritter sport milk are widely available Rainforest Alliance certified options. Look for the little frog symbol on the packets!
Making the fondant
- Dissolve sugar and glucose syrup (or glucose syrup ingredients) in the water and boil to 117°C (5 min or less - try the ‘soft ball’ stage if you don’t have a thermometer).
- Transfer to beater bowl and leave to cool to less than 45°C (cooling to room temp is fine: if you’re in a hurry, place the bowl in a bowl of water and stir to speed cooling, otherwise just leave a couple of hours).
- Beat the clear mixture with an electric beater on high until it turns into a stiff white mass (10-15 min).*
- Allow the fondant to age overnight at warm room temperature (i.e. in the hot water cupboard if the weather’s cold).
- Store in a cool place until needed.
* Sometimes it doesn’t stiffen and I don’t know why. However, if you’ve beaten it well and it’s still only cloudy, transfer it to a microwave-safe container and leave overnight. In the morning it might be fine, in which case proceed as usual, or it might have a stiff crust on it. If it has a crust, break it up a little then microwave until it’s a bit warm (30 sec on high). Knead with your fingers until all the crusty bits are gone and it’s all smooth then return to step 5 and proceed as usual.
Preparing the centres
(Do this no more than 4 days before you’re going to assemble the creme eggs. You will be adding invertase to your fondant in this step: it’s an enzyme that makes the fondant liquify and if you leave the centres too long after adding it they will be too liquid to work with.)
- Add the invertase to the fondant and mix well. The fondant will initially be quite stiff, but will soften at you work it.
- Form into a fat sausage shape on a board and divide into three roughly equal portions with a sharp knife. Set aside one portion and recombine the other two.
- Put the recombined portions in a bowl. Add vanilla essence and mix well.
- Return the vanilla fondant to the board. Divide it in half and in half again, so you have four roughly equal portions.
- Place one of these small portions in a small bowl. Add the yellow food colouring (and red if using) and mix until you have a rich egg-yolk colour.
- Recombine the three white portions of the vanilla fondant. Place these two lumps of fondant (one large and white and one small and yellow) into containers in the freezer until you’re ready to use them. This is important: they are easier to work with when they’re frozen, but this also means that the invertase won’t start to liquify them - it works best when it’s warm.
- Take the fondant that you set aside in step 2. Put it in a small bowl and add peppermint essence and green food colouring (you could just leave it white, but this way it’s easier to distinguish from the white vanilla fondant). Place this lump in the freezer along with the others.
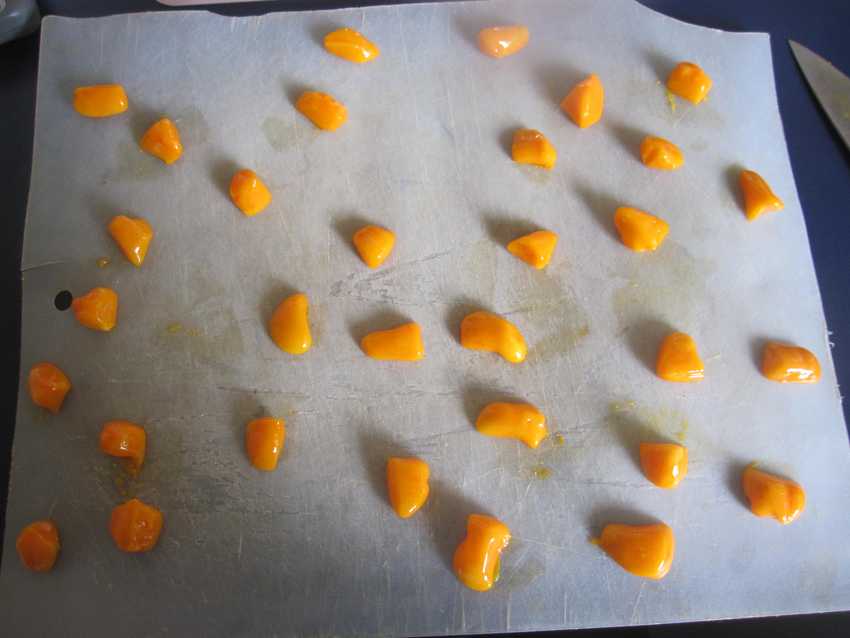
- Take out the yellow fondant and place on a board. Using a sharp knife, cut it in half and in half again until you have 32 small pieces of fondant. Return to the freezer.
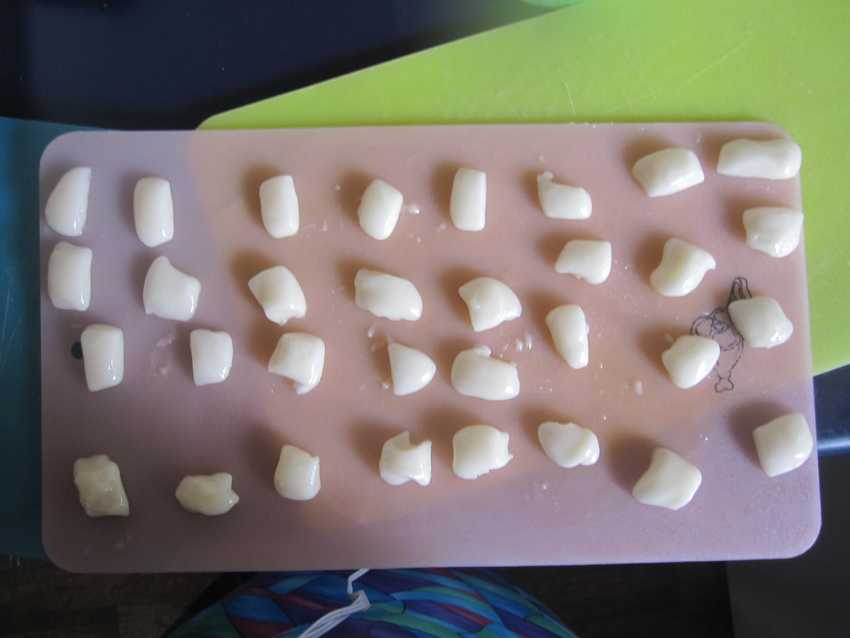
- Similarly cut the white vanilla fondant into 32 pieces, then the peppermint fondant into 16, returning to the freezer as you finish each one.
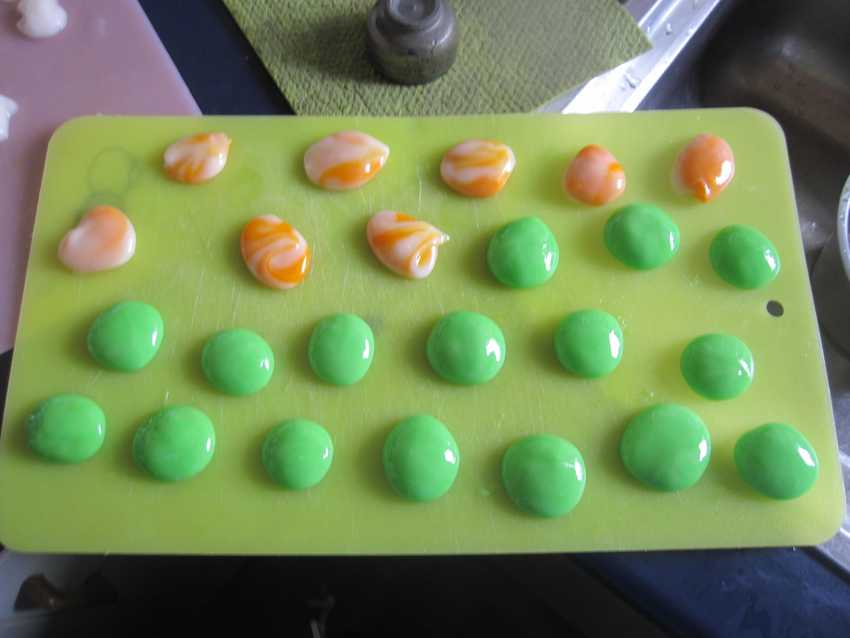
- Take out the boards with the white and yellow fondant pieces. Press one piece of white fondant into a flat circle. Drop on a piece of yellow fondant, then seal the yellow fondant within the white as best you can. Place on a board. Repeat with all the other white and yellow fondant pieces. You may need to return them to the freezer from time to time if they become sticky.
Note: If you leave the vanilla centres in the freezer divided but unassembled for more than a day or so then cover them tightly with a plastic bag: otherwise they’ll dry out too much to ever become runny.
Assembling the creme eggs
- Melt the dark chocolate.
- Paint melted chocolate into the mould cavities. Tap chocolate to remove any bubbles. Scrape to level. Put into the freezer for 1-2 minutes.
- Remove mould from freezer, coat each cavity with a second coat of chocolate, scrape to level.
- Freeze 5 minutes (they should be set when the mould looks ‘misted’).
- Tap moulds to remove chocolate. If they don’t come easily, pass through steam (i.e. over a pot of boiling water) and tap again. Return these half egg-shells to the freezer.
- Repeat steps 2-5 until you have 16 half egg-shells.
- Make a further 16 half egg-shells as above.
- Place half the halves back in the moulds. Pipe chocolate around the rim of these half-eggs then top with another half. Leave to stand in the moulds (so level) and return to freezer until set (1-2 minutes).
- Place in mould (just to hold it upright whilst it sets).
- Repeat with the remaining shells.
- Place in freezer to set.
When you remove the completed eggs from freezer, check the seals are good and touch up if necessary, then store at room temperature.
Assemble the vanilla eggs the same way, except that you start with 32 half egg-shells rather than 16.
Leave eggs at room temperature at least two days before eating - the invertase takes a wee while to work. In cold weather it could take a week.
Gives 16 peppermint creme eggs and 32 vanilla creme eggs.
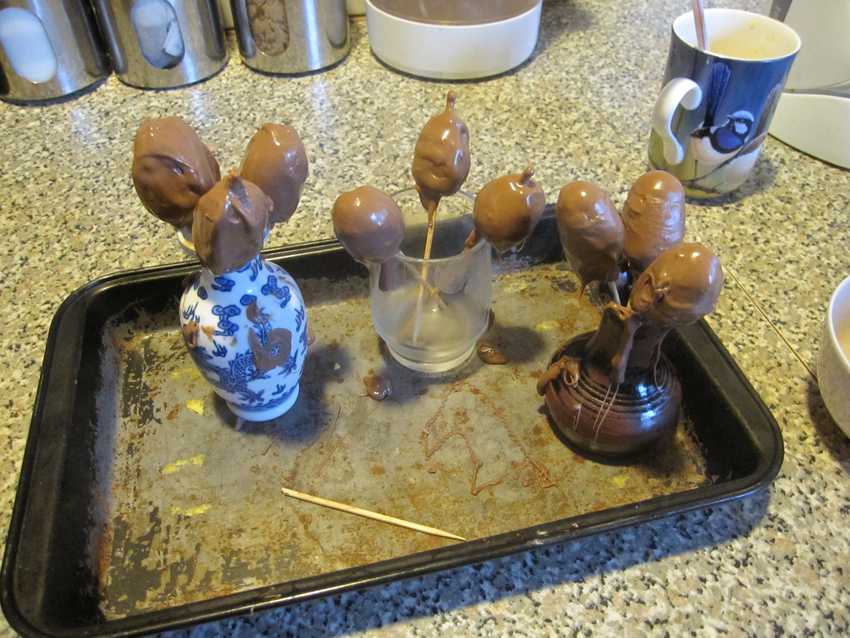
Method for assembling creme eggs if you don’t have moulds
- Slightly thaw each centre then thread onto a bamboo skewer (half length is fine) so the skewer goes right to the top of the filling. Chill in the fridge (a couple of hours) or freezer (30 min).
- Melt chocolate.
- Spoon chocolate liberally over each chilled centre then balance the sticks with their eggs in little vases or cups - 3 per little vase, 4 per cup (otherwise they touch each other). Place in fridge or freezer to set (15-20 min. or 5 min.).
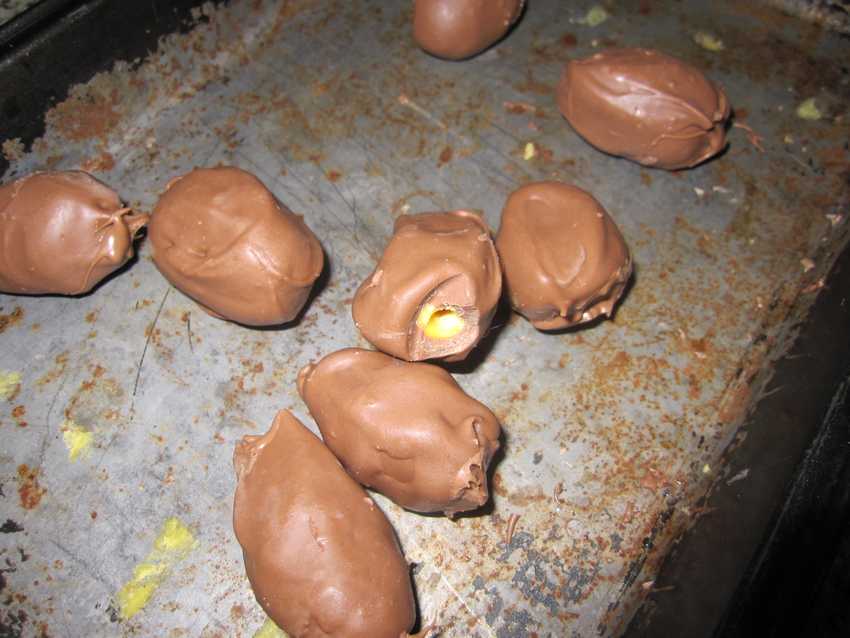
- Cut off any nobbly bits from the first coating of chocolate and straighten out any bent eggs then melt more chocolate as required and apply a second coat.
- When they are firmly set, place each egg on the bench, brace a paring knife against the egg at the point where the skewer enters it and pull out the skewer by pulling from the end.
- Using the skewer, dab molten chocolate into the hole where the skewer entered the egg and seal around the general area.
Photos
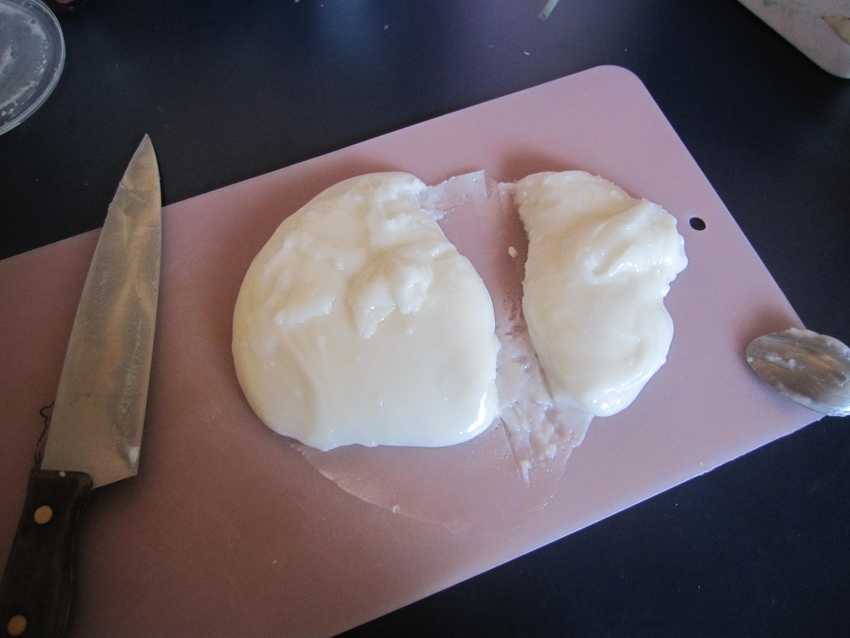
Dividing, flavouring and colouring the fondant
Fondant divided 2:1. The portion on the right will become the peppermint centres, that on the left the vanilla centres.
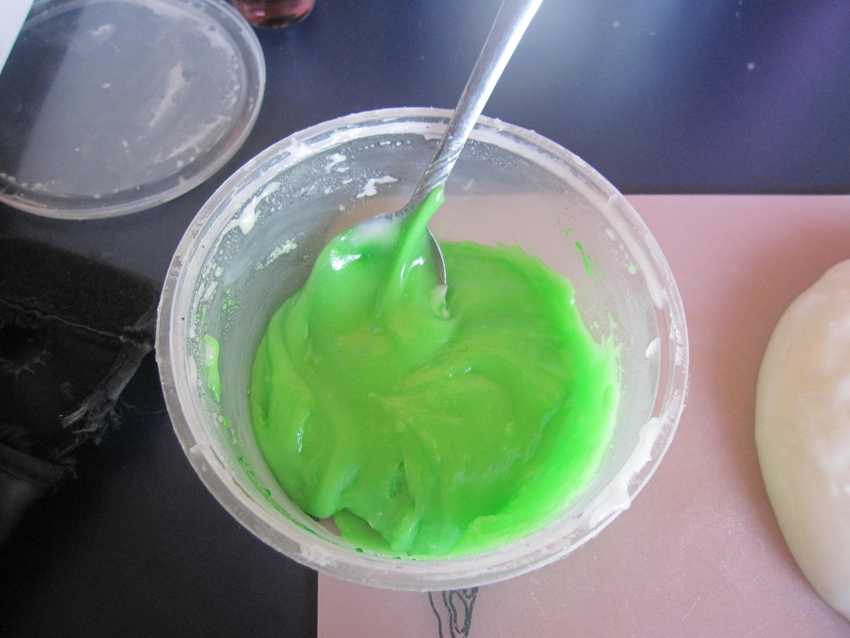
Peppermint fondant. I’d prefer a paler green, but this is the colour I get with a single drop of food colouring.
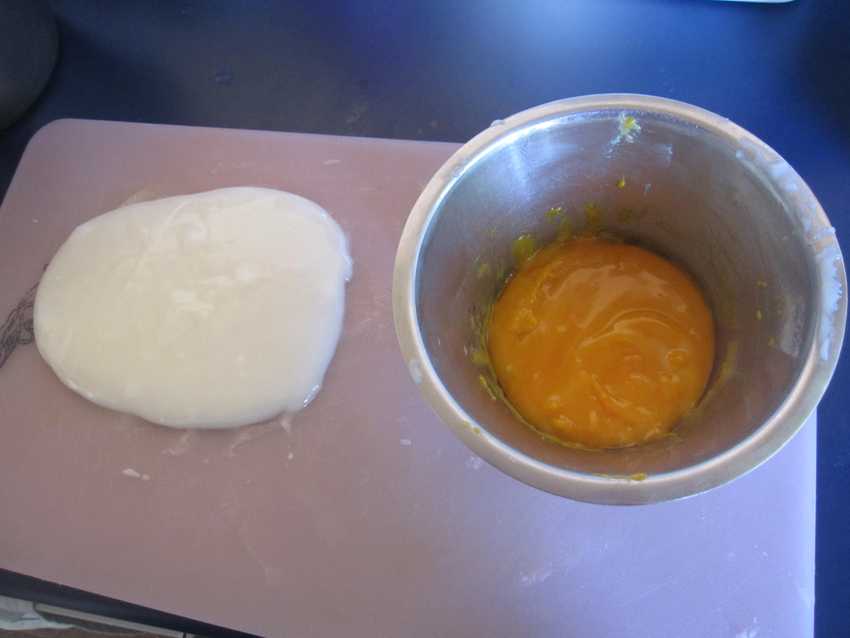
The vanilla food colouring, flavoured, divided and coloured.
Forming the centres
The fondant is quite stiff when it comes out of the freezer.
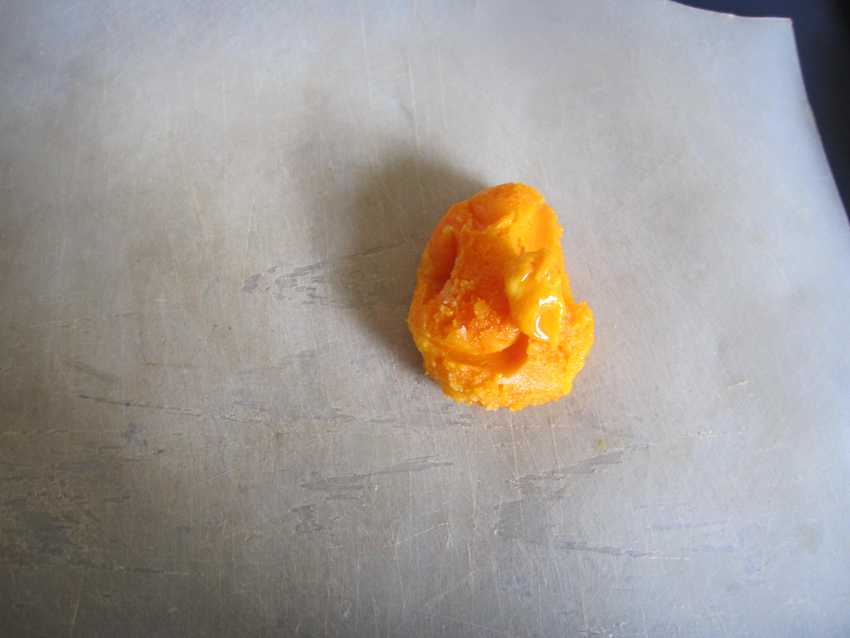
32 little yellow pieces.
32 little white pieces
Some assembled vanilla centres with the peppermint centres
Centres stored overnight in the freezer. The upper tray is held up with small cups.
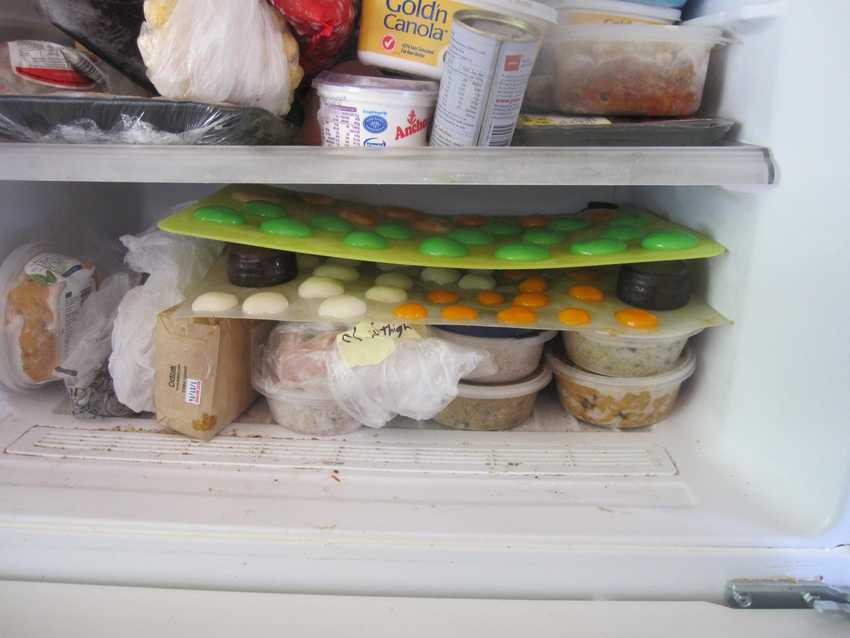
The smaller centres shouldn’t be stored in the freezer too long - they have a high surface area and dry out quickly. Once that happens they never become runny.
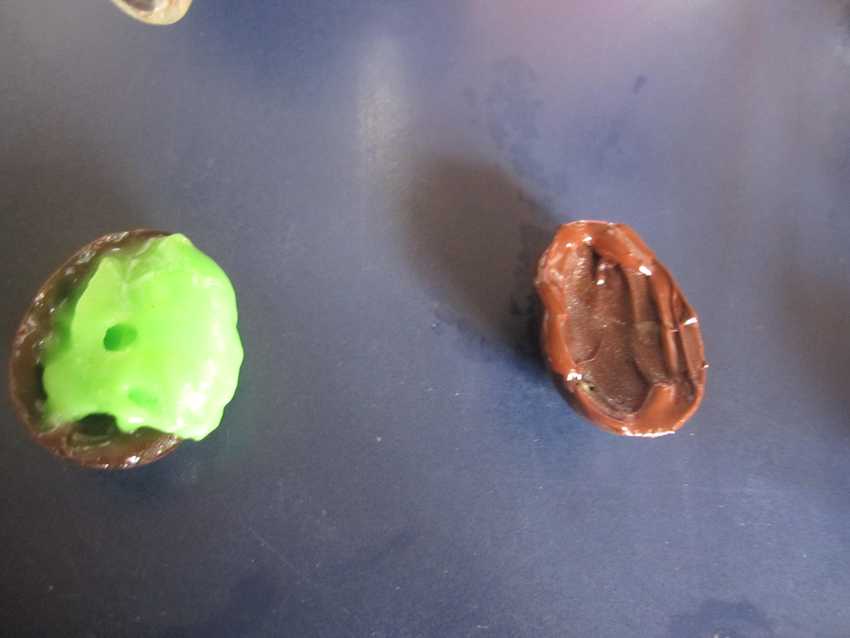
A runny centre - stored in a biggish lump in the freezer for four days.
A non-runny centre - stored in the freezer only two days, but as a flat disc with lots of surface area.

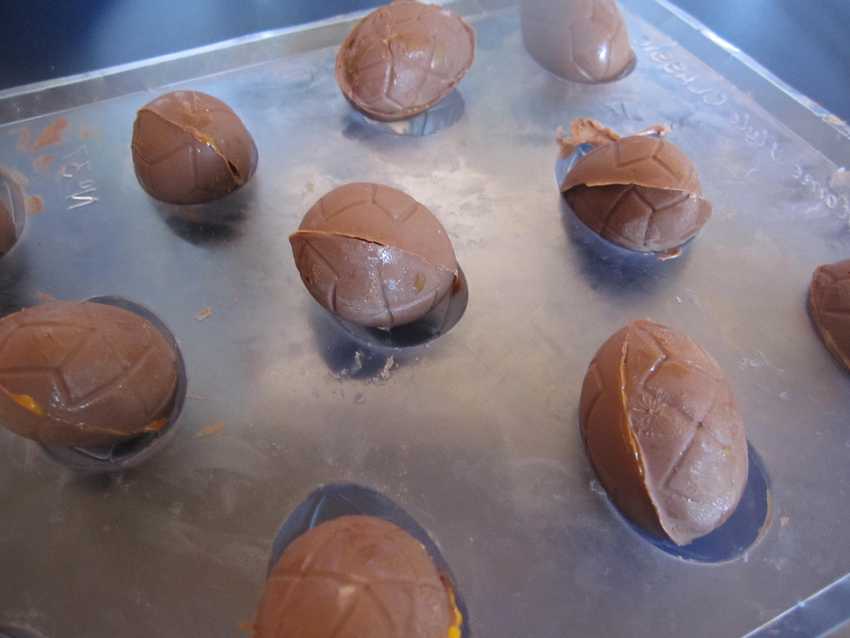
Forming the half egg shells
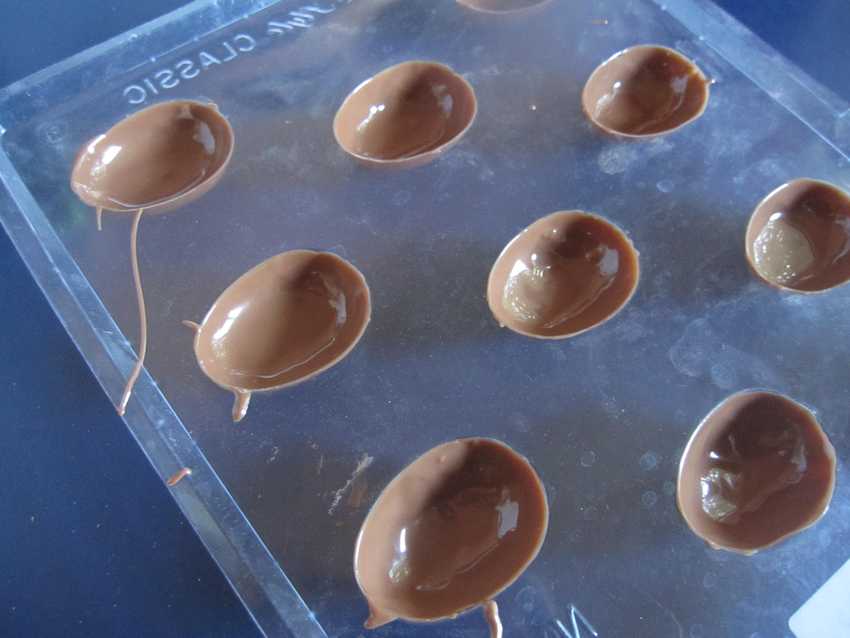
Moulds filled with first coat of milk chocolate
Joining up the eggs - method 1
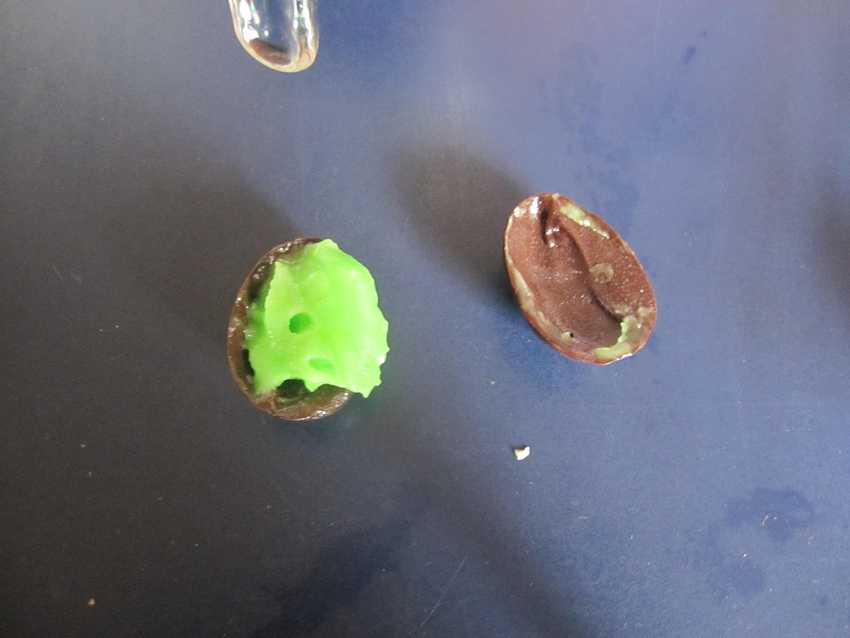
Two egg-shell halves, one with a peppermint centre and one empty.
Molten chocolate smeared on the rim of the empty egg-shell half.
Joined-up eggs, ready to be checked for leaks
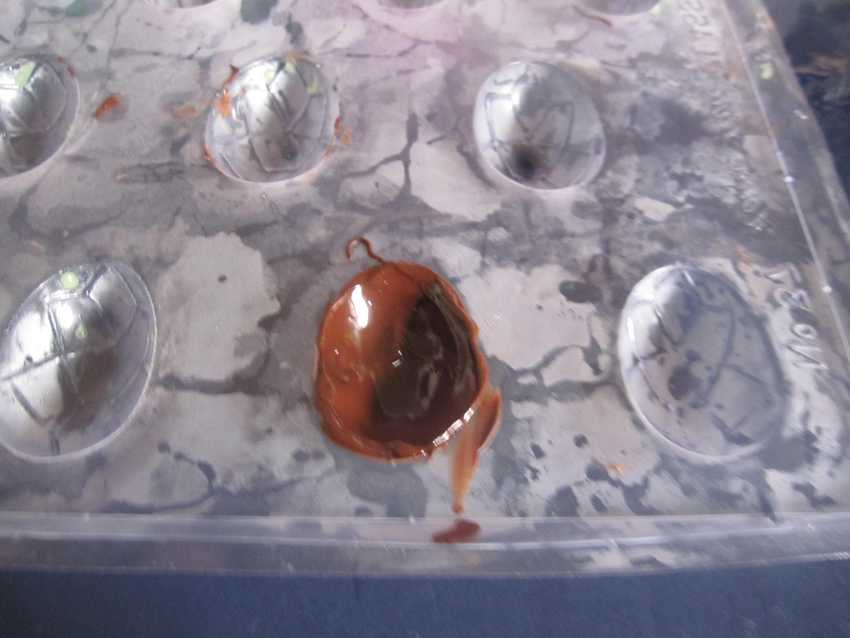
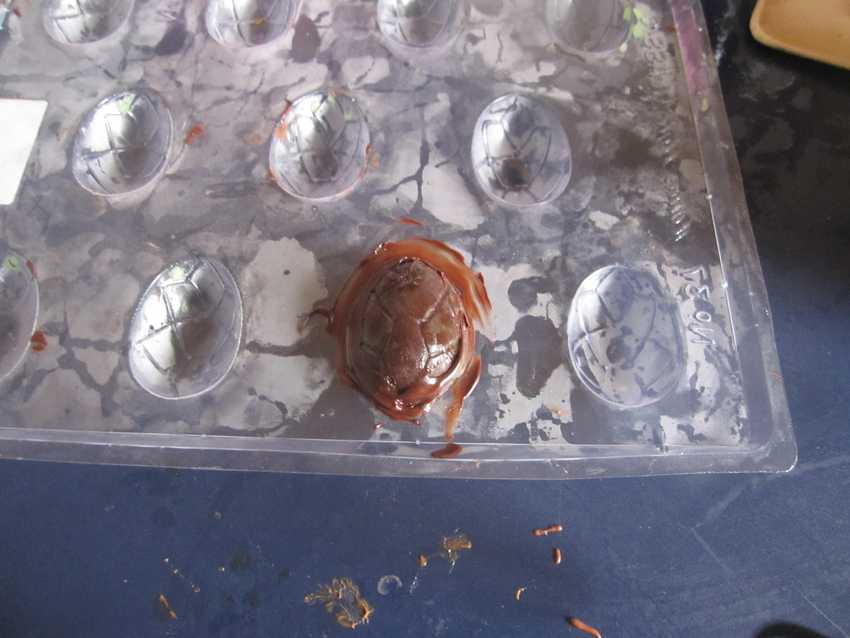
Joining up the eggs - method 2
Half-egg with its second coat of chocolate just applied.
Peppermint centre added, another half put on top and egg sealed.
Assembling creme eggs without moulds
Eggs in vases and small cups, ready to be set in freezer.
Eggs after the skewers have been removed.
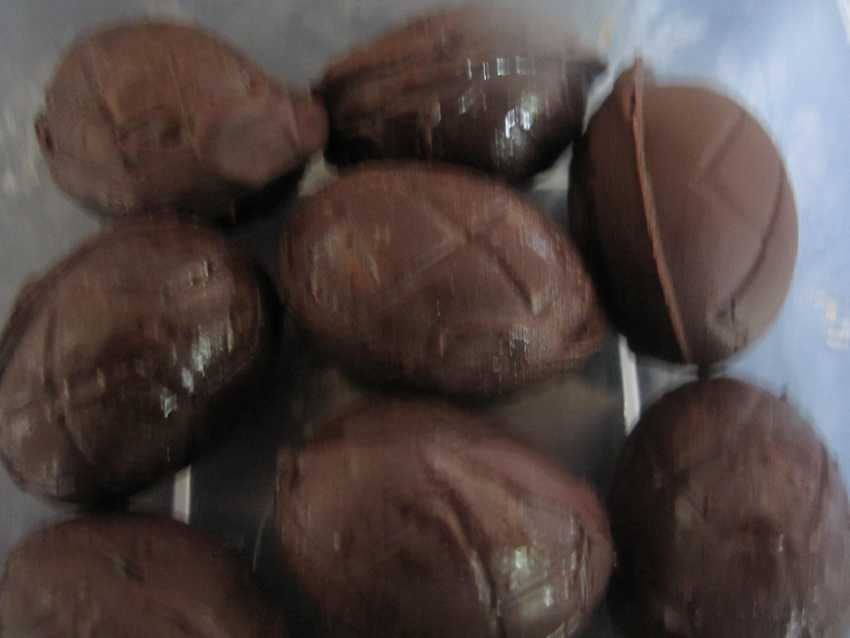
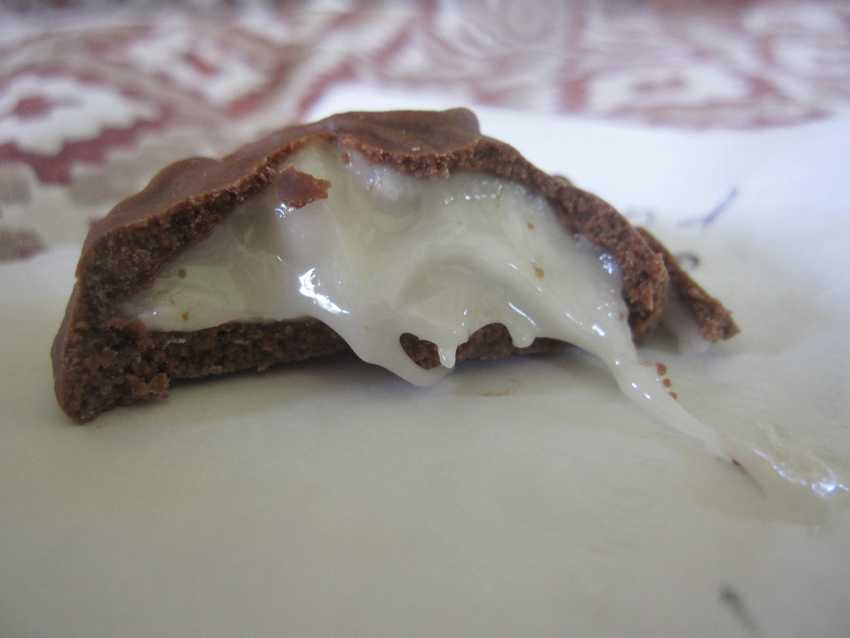
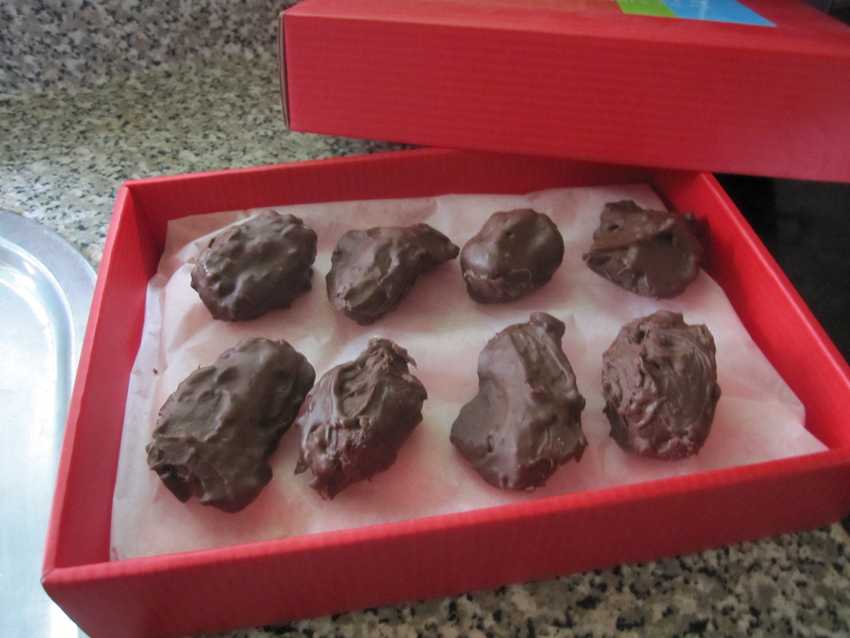
Completed creme eggs - still yummy, but pretty rough looking!
Credits
I used a number of sources for this recipe, as well as a lot of trial and error. Websites that were particularly helpful are:
- Instructables one and two
- Pimpthatsnack
- Topsecretrecipes